Showing posts with label coffee shop. Show all posts

Wednesday, July 25

Planning and Dreaming

I started planning my "new" coffee shop entrance.  On the left you see the fat front door that comes with the General Store Kit.  The other one is a 1:12 Houseworks door.  I can already see there will be bashing to do!


I'm thinking about adding an outdoor dining area to the right of the shop. So far I've measured and cut a new floor to accommodate the additional space.


I've always liked Barb's Garden Kit by Victoria Miniland.  I may try to do something like it here?  I found this video at Creating Dollhouse Miniatures.  


I may have to add another kit to my kit?!

Right now I have to wake up and get to work in the real world.  Sure is fun dreaming though...

Hope you have a great day!


Monday, July 16

Loft Ceiling


It's time for me to make a decision about the ceiling of the coffee shop loft.  Both of these images were found at Boston Lofts, a very inspiring web site!

 I could stain the beams.  

Or I could paint them white.


I mixed up some glaze this morning using 3 parts glaze to one part of my custom paint color.  Don't tell anyone that sometimes I use my real tablespoons to mix paint! 


I tried this glaze to see if I liked it. 


Yep.  Decision made. That was easy!  Wish all decisions were so simple. 

But then again, maybe they are not so easy?  :D


Hope you have a great day! 

Saturday, July 14

Forty Two Toothpicks

Casey sent me a big bag of colorful quilling paper recently.  I am planning use some of it to make light fixtures for the coffee shop.  This morning I found inspiration for another idea.


I have all of the colors I need to match this fabric.  Thanks Casey!  :D

I glued forty two toothpicks into a foam core base.  Then I started weaving. This is what I've done so far.


Not sure where I will use this little sofa?  It might become a porch swing for Grandma?  You remember Grandma, don't you?  :D

THIS is my inspiration.  Beautiful.  I love the modern, natural look.  The table is great too!


 Hope you have a wonderful day!  Be inspired!

Wednesday, July 11

Pool Table Rails

I think I've finally figured out how to make the rails for my pool table.


Here are the parts I am using:
1/4 inch crown molding
A skinny stick painted white
1/8 inch by 1/2 inch strip wood
1/4 inch square dowel
Fabric


I wrapped the flat side of the crown with my fabric.  Then I glued the painted skinny stick to it to make a "feather board."   This was glued to the square dowel and then attached to the side of the wood strip.

Here is a photo of the end of the rail.  It will need to be mitered and the fabric folded down into what will become the pocket of the table.


I looked at a LOT of websites to come up with this.  The ones about recovering a real pool table were the most helpful.

Once I get the rails completed I can then attach them to the table top.  Something like this...


So far, I haven't used any glue on the fabric.  I will pull it tight on the rail and use glue on the underside if needed.  I tried spray adhesive on a small sample board for the pool table surface.  If I am very careful positioning my fabric I think that will work?

I need to make six of these rails.  That should keep me busy for a while!  The reason I am designing my own rails is that the tutorial is not to scale.  Real pool table rails are at about 6 inches wide.  One little piece of molding just didn't look right...

Hopefully, my coffee shop will get some attention this coming weekend?  I've been think about colors again and have decided that the entire project needs to be light and cheerful and sunshiny.  :D   No black floors or ceilings.  No dark furniture.  More projects to do, more things to make!

Hope YOU have a bright, sunshiny day!

Saturday, July 7

Pool Table?

Now I'm thinking about making a game room above the coffee shop.  There is just not room for a sports bar or stage. Every game room needs a pool table, right?


This morning I started looking for information on how to make a miniature pool table.  I LOVE this real pool table designed by Michael Wells,  found at toxel.com.


De at De-Lightful Minis made a pool table for her saloon.  She used a tutorial she found at One Lucky Bug.  I think De's table turned out great!  :D

I want mine to be more modern, like my inspiration table.  I cut the top from 1/8" basswood.  Now I'm trying to figure out how to build the rails and do the ball pockets. 


Looking at REAL life projects is always helpful to me.  This site gives complete instructions on how to build your own real pool table.  Yikes!  Does anyone actually do that?!!

I could just buy a little pool table.  Like this one on Ebay at Carolyn's Miniatures.  Sadly, it is not within my budget!

I did bid on a Hallmark collectable ornament that I think will be perfect for a game room.  If I win, I will post it.  It's another splurge, but like the Coke machine, not something I could make myself.

Mary Charles @ Mary's Dolls and Dollhouse store here in Birmingham once told me, " if you see something you like and don't think you can make it yoursef, then buy it."  I haven't visited Mary Charles recently.  I wonder if she has some flooring I might like?

If I am ever going to finish this project I am going to have to stop coming up with new ideas!

Hope you have a great day!

Friday, July 6

Keep Calm And Carry On!

I want to thank you for your sweet comments and encouragement yesterday!  I am overwhelmed by your love and support.  I must admit I did cry when I read what you said about my project.  They were tears of gratitude, not sadness.  Big HUGS to all of you!

Now it's time to get back to work!!!!


I clamped the shop together this morning.  I measured the crown molding (again) that will support the second floor and started work on the upstairs ceiling.  It will have wooden beams that are 16" on center.  :D 


The longer pieces you see will go over the extension for the stairs.  It is all upside down right now...  This is the second floor.


I still haven't decided what to do here? 

I'm feeling much better today and excited to start work again. Thanks again for your kind support!

Mini friends are the BEST of friends!  :D

Saturday, June 23

Back To Work

I don't know if you will even notice, but I repainted the coffee shop walls. I like these colors better.

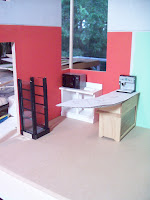
I've also been working on the serving area. The raised floor is done. Now I can start building the counter.


There is only so much cleaning one can do before the urge to get back to minis takes over!

I'm going on a little excursion today. I need more coffee sleeves from Panera Bread. :D

I also discovered a place called Harbor Freight.  It doesn't sound like a place for mini supplies, does it?   There is a store not far from me. They have 12" adjustable clamps on sale for $1.99 each!  Gotta go!

Hope you have a beautiful day!
 

Friday, June 15

It's Only Paint

This idea has been in the back of my head from the beginning.  I know it's a bold move.


I wanted some color in the coffee shop and now I have it! I'm going to look at this for a while before I decide if it stays. It's only paint. I can always change it.

I'm also trying different layouts for the serving area.


I may just buy a display case instead of trying to build one with a curved counter? I'll need to find one that is the right dimensions. This one is on Ebay.

If I can't find the size I need, I may try Lesley Shepherd's tutorial at About Miniatures.com to make one?

Thank you for all of your sweet comments about my coffee cup book shelf. :D

I made it using one piece of card stock that was 3/4" wide and 11 1/4" long.  Then I just folded it to the shape I wanted, glued it, added a back and wooden shelves.


I might need to make one that is just a little bit smaller now that I see where it will go. I may not add the back to the next one and just leave it open?  We'll see...

Hope you have a wonderful day!


Tuesday, June 5

Design Changes

Design changes usually lead to delays.


Expect delays . . .   :D

Saturday, June 2

Building the Bar

I started fiddling with my little lights this morning.  After a while, I realized this is probably NOT a good day for that.  My level of patience is not what it needs to be today.  SO.   I started building the bar.


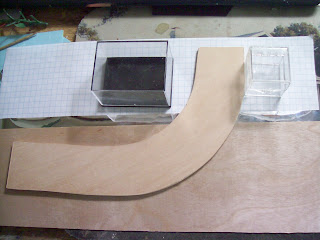
I decided a curved bar might look nice.  I cut the countertop from basswood.  This nice piece of plywood laminate may work for the front of the bar?  I will need to make a trip to Michael's to get more wood for the shelves inside. 

My real motivation for getting out of the house is to escape this.  My work table!


It will be much more fun to shop than clean up this mess!   I probably need to learn to finish one project before I start another one.  Maybe?  Some day?

Hope you have fun today!


Friday, June 1

Mini Lights

I gathered some supplies together this morning to make mini light fixtures for the coffee shop.


Google gave me lots of ideas!

Pretty cool, huh?    These are some I've started working on.  I need to find the right glue, the right clamps and a whole lot of patience!  
Blogger is giving me grief today.  Sorry about the huge empty space here!

Hope you have a great day!


Tuesday, May 29

Busy

I've been busy.  Painting paper, cutting stones and now this.  I wanted to try my coffee print fabric on one wall of the shop. I think I like it.

I found this bamboo "flooring" at KMart.  I like how it looks like parquet.  I don't like how busy the pattern looks on the floor.  I think I will cut them up and just use the lighter blocks? It has a mesh backing so it shouldn't be too difficult to do?  I hope.

I received my LED lights from Evans Designs.  Shelly was a huge help with figuring out what I needed.  She even made me some switches so that I can turn the outside, upstairs and downstairs lights on and off separately!   Amazing.  IF I can figure it out?  I love that Shelly said, "if you have any questions,  I'm only an email away!"  :D  Great customer service!  Thanks Shelly!

Hope you have a good day!  Why do the weekends seem to go by so fast?

Saturday, May 26

Today's Project

Today's project is cutting the base and second floor for the coffee shop. 


I measured and marked my 1/4" plywood.  Then I read about jig saw blades to find out what size to use and started cutting.  I didn't notice that Dylan was asleep under my table!  I have no idea why he didn't move!?

Poor baby!

I can't cut a straight line with a jig saw to save my life! 


I remeasured.  Then I straightened my cuts with a utility knife.  Yes.  If you go slow and use new blades, you can cut thin plywood with a utility knife.  Where there is a will there is a way!


I dry fit the shop together.  So far, so good.  This is the new front door and the crown molding I'm using to attach the second floor.


Here is a peek at the apartment upstairs with one of the skylights.


I still have lots of work to do.  Hope you have a beautiful day!